Category Archives: Xpert360

UK TechDays Online – November 6-8

TechDays Online – November 6-8: The final programme update! Featuring Steve Ballmer, Will Greenwood and the Lotus F1 team!

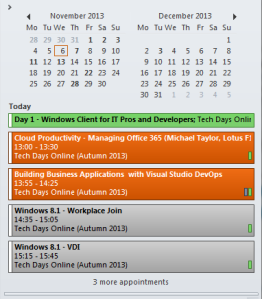
Complimentary session calendar here: TechDaysOnlineAutumn2013.ics

TechDays Session Calendar

TechDays Session Calendar

Follow official twitter feed: @TechNetUK

UK techDays Online (Autumn 2013)

Register for TechDays Online

Here is the Final programme update for each day of UK Tech.Days Online (Autumn 2013) from Wednesday November 6-8.

Don’t miss out!

Something you should know about LightSwitch Screens – Part 1

Hidden secrets of LightSwitch Screen Contents!

So you think you know your screens, what is the point of this post? No, seriously, look again real close. Notice anything… odd, out of place, you should. Test your powers of observation and be more inquisitive. Do you have a LightSwitch Rich Client application? If so you had better read on…

This article is part of a series of posts from Xpert360 Development Team to address real world scenarios and problems faced when designing, creating and implementing Visual Studio LightSwitch applications. Brought to you by the original and genuine Power Tools for Visual Studio LightSwitch!

Let us start by looking at a Contoso based LightSwitch application. Here it is looking rather fetching in its Jetpack-style theme.

Contoso Home Screen - Jetpack Theme

Contoso Home Screen – Jetpack Theme

Could this simple screen be hiding any secrets? You would think not. Hats off to you if you do know the hidden secret behind this home screen. Here it is again in screen designer.

Contoso Home Screen in Designer

Design view of Contoso Home Screen

Look closer. No, the secret is not the globalised labels. In fact we cannot see the hidden secret in the above screen shot. We need to take a different view.

LightSwitch Explorer -Contoso Home Screen Content

LightSwitch Screen Workbench -Contoso Home Screen Content

If you use AIDE for LightSwitch Explorer or Screen Workbench you can obtain a list of the screen contents. In the above example I have exported the list to Excel and marked up the content for easier viewing.

Look closely at the screen content items and match them up with the designer view. Hidden underneath the RowTemplate item we have 15 other items that correspond to the properties of the Appointment entity.

These screen items are expected, they seem kind of plausible, they are necessary to the functioning of the screen. Is any of this statement correct? Err… No! Take a look at this modified set of screen contents taken from AIDE Screen Workbench.

Contoso Home Screen Content Optimised

Contoso Home Screen Content Optimised

With these screen contents the resulting Home screen appearance is the same as before. Really it is, it works fine. It did not need the hidden items. I use the LightSwitch Exchange Hub for quick backup and restore and in this case it shows the real size difference in the Home screen metadata.

Exchange Hub Home Screen Backup

Exchange Hub Home Screen change detectedand backed-up

Then looking at the before and after Home screen metadata backup-ups.

Backup Home Screen Lsml Size

Backup Home Screen metadata size

So this simple Home screen’s metadata has shrunk from 19KB to 11KB. You may be asking yourself, did I edit the Client.lsml file, well did I?

Until next time…

[continue to Part #2]

ooo

Try them and support your LightSwitch tooling ISVs.

Also, do participate in forums and vote on your desired AIDE features. Help us to help you by prioritising the features in the product roadmap. VS2013, check! Export/Import entities and settings, check! Do you want to shape data to exclude columns? How about a localization workbench? Optimization workbench? Update metadata in bulk? That is a flavour of a few forthcoming features and ideas, we always keep a few things secret to surprise you!

ooo

Company information: Xpert360 Ltd, founded in 2009, is an Independent Software Vendor and Custom Solution Provider based in the United Kingdom.

Xpert360 Lightning” and “AIDE for LightSwitch” are trademarks of Xpert360 Ltd, copyright 2013.

Backup – AIDE for LightSwitch Exchange Hub

This article is part of a series of posts from Xpert360 Development Team to address real world scenarios and problems faced when designing, creating and implementing Visual Studio LightSwitch applications.

Exchange Hub in Xpert360 Lightning AIDE V1.1 Release

The original and genuine Power Tools for Visual Studio LightSwitch!

The Exchange Hub is a feature new to AIDE for LightSwitch V1.1. This release of the power tools is being packaged as I write. The upgrade is free to existing users who will be contacted in the coming days. The next version targets VS2013 and we are pleased to announce that our loyal customers will also receive this at no additional cost (subject to license purchased by end of September 2013). In this post we will demonstrate the features and usage of backup.

AIDE for LightSwitch is supplied as a signed Visual Studio Extension. The AIDE software is integrated into the Visual Studio IDE as standard and familiar dockable windows. It now supports VS2012 themes: light, dark and blue.

New AIDE for LightSwitch Menu

New AIDE for LightSwitch Menu

All the AIDE windows including the Exchange Hub can be accessed from the ‘Tools’ menu (also from ‘View’ menu ‘Other Windows’ by default).

Upon first launch you will need to dock the Exchange Hub window in a suitable location in the Visual Studio IDE.

AIDE Exchange Find Updates

Using AIDE to detect screen changes

The Backup tab manages screen backups and detects modifications made since the last backup. To take a backup you simply need to select all items using the top checkbox and click on Backup. The Exchange Hub looks after all the behind the scenes work and only backs up screens that have been modified. It skips past screens not changed since the last backup.

Exchange Hub backup run - dark theme

Exchange Hub backup run – dark theme

The backup runs are very fast and take less than a second for this Contoso application. In this screen shot, the Exchange Hub detected changes to the screens highlighted in green and backed them up. I popped-up the VS2012 output pane so that you can see the logged details of the backup. Information is  logged here from all corners of AIDE for LightSwitch.

Screen backups are stored one per file, very similar to the new metadata storage structure coming in Visual Studio 2013.

The in-built Restore feature allows for screens to be modified and rolled-back if you want to discard changes made since the last backup. The Exchange Hub does keep multiple backups.

Under the covers here is the additional folder structure automatically created and managed by the Exchange Hub.

AIDE Exchange Backup Folders

Backup folder structure

You don’t need to look here in normal day-to-day usage. The ‘_AIDE‘ folder stores all the files necessary. There are further sub-folders, ‘_Client‘ and ‘_HTMLClient‘, one for each LightSwitch client, that hold backup files.

The source code control folders can be added to TFS or similar to track changes to individual screens, not the larger full ‘Client.lsml‘ metadata file. This is unique to VS2012. The ‘Export‘ folder is the default location for the Export and Import features that will be demonstrated in later blog articles.

Try them and support your LightSwitch tooling ISVs.

Also, do participate in forums and vote on your desired AIDE features. Help us to help you by prioritising the features in the product roadmap. VS2013, check! Export/Import entities and settings, check! Do you want to shape data to exclude columns? How about a localization workbench? Optimization workbench? Update metadata in bulk? That is a flavour of a few forthcoming features and ideas, we always keep a few things secret to surprise you!

ooo

Company information: Xpert360 Ltd, founded in 2009, is an Independent Software Vendor and Custom Solution Provider base in the UK.

Xpert360 Lightning” and “AIDE for LightSwitch” are trademarks of Xpert360 Ltd, copyright 2013.

AIDE for LightSwitch General Release

Today saw the full commercial release of the long awaited AIDE for LightSwitch, a suite of power tools designed to assist LightSwitch developers.

AIDE for LightSwitch is a Visual Studio extension that advances the LightSwitch design experience. It surfaces hard-to-access metadata which complements working with the standard LightSwitch designer. Metadata is collected and presented in intuitive views to assist your development.

Designed and developed by our LightSwitch Experts and fully integrated into Visual Studio for a seamless user experience.

With Version 1.1 features such as Import and Export of screens, Entity Workbench and Project Optimisation already in final stages of development, we have released version 1.0 which includes a free upgrade to Version 1.1 for those who take advantage of the introductory offer available for a limited time.

Features

CLONE Screen 

Ever wanted to copy a LightSwitch screen? AIDE provides a simple copy screen process from the Screen Workbench. No more starting over on each screen in your project.

Clone Screen

LightSwitch Explorer 

Getting the big picture can be difficult especially on medium to large LightSwitch Solutions. AIDE provides the following ‘must have’ functionality to make searching for properties a thing of the past.

LightSwitch Explorer

With the AIDE LightSwitch Explorer you can :

  • Examine your screen, entity, project and solution metadata in one window.
  • Sort, resize and re-order the output columns
  • Double-click  to launch the file, screen or entity in the design window
  • Export the data to the clipboard for further analysis in  Excel or paste into Word for documenting your application.

Screen Workbench

Bring together all your screen metadata in one location with drill-down links to related assets, design windows and code behind.

Screen Workbench

  • Examine all  your screen metadata in one location.
  • Compare the properties of your screens properties side-by-side.
  • Double-click to Launch standard edit and design windows and the code-behind.
  • Create copies or backups of screens.

Visual Studio IntegratION

Designed to run natively within Visual Studio 2012 with dockable windows and standard styling. Supports multiple projects in solutions and multiple instances of Visual Studio.

drag window

Coming Soon in Version 1.1

IMPORT / EXPORT 
PROJECT OPTIMISATION
ENTITY WORKBENCH

View the full product roadmap…

Find Out More

For more information or to download the Trial or Buy AIDE, visit the Xpert360 website and Product Forums or view the Visual Studio Gallery Product Page.

For a limited period AIDE is on a reduced introductory sale price which includes a free upgrade to Version 1.1 features when available. See website for details.

Xpert360 Lightning” and “AIDE for LightSwitch” are trademarks of Xpert360 Ltd, copyright 2013. 

Lightning Series for Salesforce CRM released

Microsoft LightSwitch data source extension for Salesforce

Xpert360 Lightning Series for Salesforce released!

This week saw the release of the next Lightning Series product aimed at bringing together Microsoft Visual Studio LightSwitch with Salesforce. We are expecting to see a surge in uptake of LightSwitch as VS11 beta approaches release. Add to that Office365, the rollout of Windows 8 and the next version of Visual Studio. The Lightning Series products will be addressing the integration and productivity needs of this market space bringing together disparate data from Microsoft Dynamics CRM online/on-premise, Salesforce, Zendesk, HubSpot, Nimble, Office365 and more…

The products are professionally developed commercial software with support contracts available. The difference is the commitment of Xpert360 to deliver FREE product licenses for everyone. This policy will continue provided that there is enough interest from the communities and enough revenue is raised from add-on work and custom versions for Enterprise use. The more people use the Lightning Series products, the better they will get and everyone will benefit.

We develop and use code generation technology rather than purely develop the actual products themselves. This helps us to drive down development costs and is allowing us to transition these activites to the cloud and SaaS over the next year.

The next release of the Salesforce adapter is expected by the end of June 2012 and there is still time for user feedback into the release program.

The next Lightning Series LightSwitch Data Source to be released will support zendesk. We decided that because we are using it ourselves. After that we will be looking for feedback to gauge the demand to prioritize the release other data adapters for the likes of HubSpotnimble and Office365. The series will soon include other custom controls and very importantly, Enterprise-class productivity tools aimed at LightSwitch to make the platform irresistible.

For more information visit the Xpert360 Support and Forums and follow this blog to see how the story unfolds.

Xpert360 Lightning Series for Salesforce

Visual Studio Gallery – Xpert360 Lightning Series for Salesforce

Visual Studio Gallery entry

Visual Studio Gallery entry

Working with SalesForce and Dynamics CRM data in Visual Studio 11 Beta

Microsoft Visual Studio 11 beta and Windows 8 Consumer Previews were made available on Feb 29th 2012. They will be valid through to June 2012.

The Xpert360 development team took the beta for a spin with the latest versions of the Xpert360 Lightning Series product builds: WCF Ria Service data source extensions for LightSwitch and .NET 4 that connect to salesforce and Dynamics CRM Online instances.

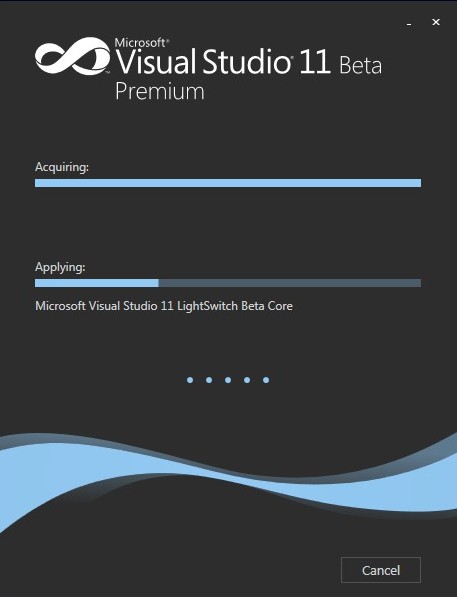
VS11 Beta Premium Applying: LightSwitch Beta Core

VS11 Beta Premium Applying: LightSwitch Beta Core

After the VS11 install a quick rebuild of the data extensions VSIX in VS2010 pulled in the latest software versioning as shown below:

Clip for LightSwitch Data Extension vsixmanifest

Clip for LightSwitch Data Extension vsixmanifest

The new VSIX files now prompt for the version of Visual Studio if not already installed and within ten minutes of the VS11 install we are building our first Visual Studio LightSwitch 11 application to interact with our CRM test systems.

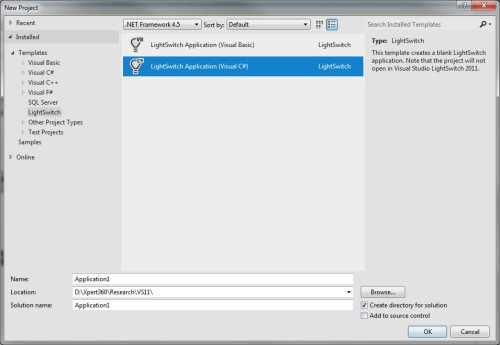
LightSwitch project templates in VS11 Beta

LightSwitch project templates in VS11 Beta

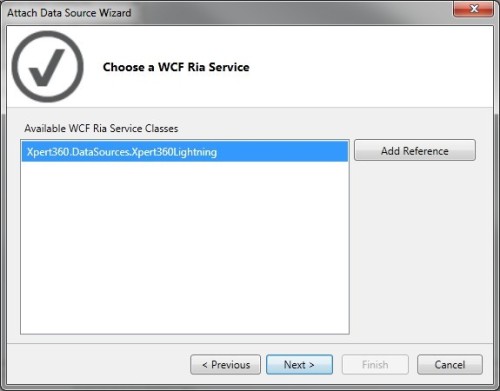
Then we create new data connections with the Xpert360 Lightning Data Extensions.

LightSwitch designer - Choose a WCF Ria Service

LightSwitch designer - Choose a WCF Ria Service!

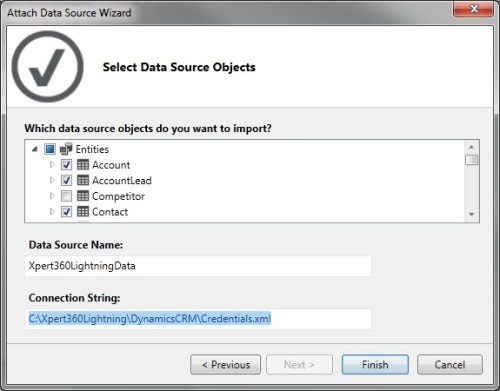
… and we move on and choose some of the CRM entities exposed by the service.

LightSwitch designer - Select Data Source Objects

LightSwitch designer - Select Data Source Objects from Dynamics CRM Online

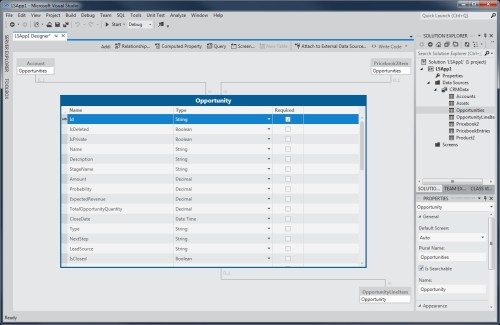
The chosen entities appear against the data source in the LightSwitch designer and can be explored and manipulated as usual. Notice the automatically available entity relationships between the salesforce entities.

LightSwitch designer - SalesForce Opportunity Entity

LightSwitch designer - SalesForce Opportunity Entity with chosen subset fo relationships

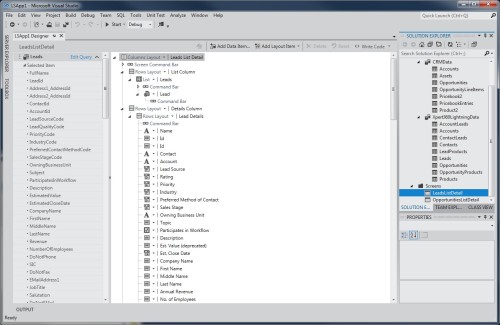
A few more clicks to build a list detail screen…

LightSwitch designer - Xpert360 Lightning Data Extensions

LightSwitch designer - Xpert360 Lightning Data Extensions

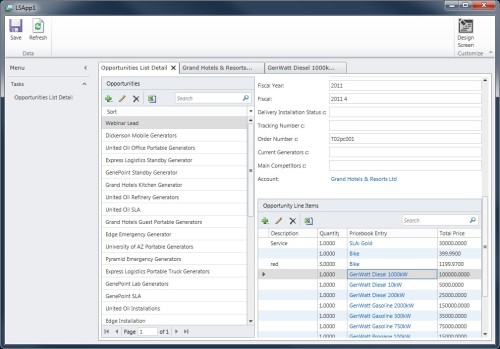
Ten minutes later we have our first CRM data from salesforce and Dynamics CRM Online.

LightSwitch - SalesForce Opportunities List Details

LightSwitch - SalesForce Opportunities List Details at your disposal

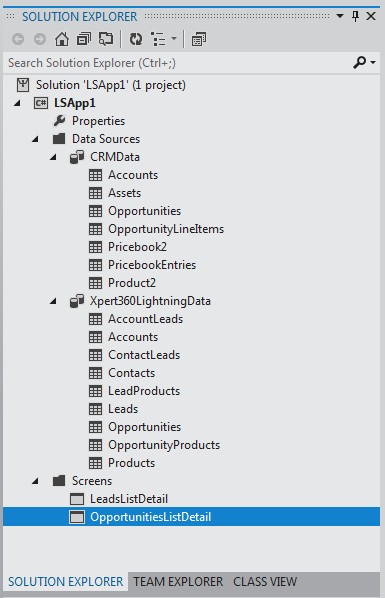
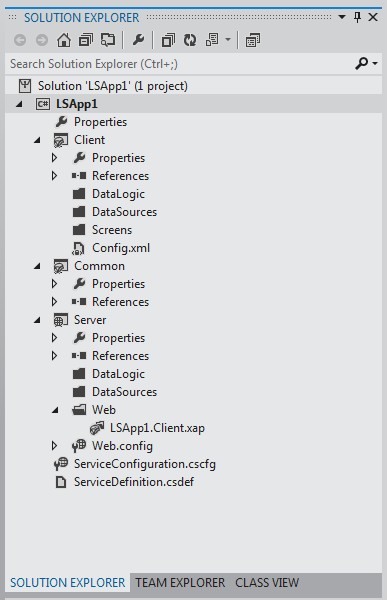
Looking around in the VS11 IDE the default theme has faded to grey, perhaps its vying for an Oscar with “The Artist”. Here are the two LightSwitch project views available in solution explorer:

LightSwitch designer - Logical viewLightSwitch designer - Logical view

LightSwitch designer - Logical and File views

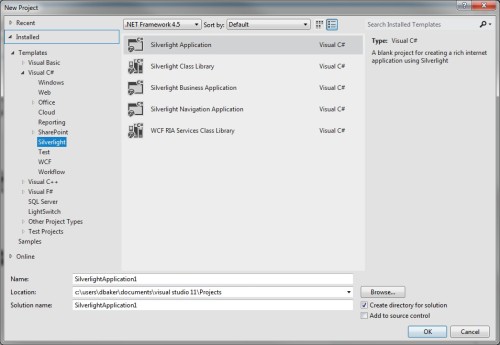
If you are embarking on custom UI controls with Silverlight 5 then here are the available project templates in VS11:

VS11 Beta Silverlight project templates

VS11 Beta Silverlight project templates

We are also eagerly awaiting the VS11 LightSwitch Extensibility Toolkit which has been indicated to be ready in a few weeks by Beth Massi:

The Xpert360 Lightning Series data extensions will unleash the true power of LightSwitch onto your salesforce CRM and Dynamics CRM Online data very soon. They are currently undergoing private beta testing which will now be extended to include the VS11 Beta as this platfrom has a go-live license.

If you somehow missed all the anouncements here are the links:

Any feedback or enquiries welcome at mailto:info@xpert360.com

PivotViewer Shorts Part 4: Restyle the ZoomSlider child controls

Introduction
By default the SL4 PivotViewer control displays a custom control for controling the zoom-level of the tile views. A few people have expressed a wish to totally reskin the control and this is a step along that path that hints at the technique needed to dig deeper into the PivotViewer visual tree.
 
This short post shows how to locate the UI element for the control bar, the ZoomSlider, all its visual elements and then alter their background.
 
PivotViewer ZoomSlider Re-Styling

PivotViewer ZoomSlider Re-Styling


Locating the UI Elements

The flow of the code goes something like this:

  • Locate the “PART_Container” in the tree. This is a Grid control.
  • Or… go direct to the “PART_ControlBar” element.
  • Locate the ControlBarView to access the child controls.
  • Build a list of child controls using VisualTreeHelper.
// Locate UI Elements
    ControlBarView ControlBar = (ControlBarView)this.GetTemplateChild(“PART_ControlBar”);
    Grid ctrlBarContent = (Grid)ControlBar.Content;
    DockPanel ctrlBarDockPanel = (DockPanel)ctrlBarContent.Children[2];
    ContentControl ZoomSlider = (ContentControl)ctrlBarDockPanel.Children[2];
    ContentControl cc1 = (ContentControl)ZoomSlider.Content;
//

// Build a list of the child controls
    var ctrls = GetChildsRecursive(cc1);
//

// Pick out controls and re-style as you wish 
    foreach (UIElement ctrl in ctrls)
    {
        string s = ctrl.GetType().ToString();
        switch (s)
        {
            case “System.Windows.Controls.Button”:
            Button b = (Button)ctrl;
            b.Background = new SolidColorBrush(Colors.Orange);
            break;
        case “Microsoft.Pivot.Internal.Controls.ClickDragSlider”:
            ClickDragSlider cds3 = (ClickDragSlider)ctrl;
            cds3.Background = new SolidColorBrush(Colors.Green);
            break;
        default:
            break;
        }
    }
;

// Helper function for child controls
IEnumerable<DependencyObject> GetChildsRecursive(DependencyObject root)
{
    List<DependencyObject> elts = new List<DependencyObject>();
    elts.Add(root);
    for (int i = 0; i < VisualTreeHelper.GetChildrenCount(root); i++)
        elts.AddRange(GetChildsRecursive(VisualTreeHelper.GetChild(root, i)));
    return elts;
}
+
FAQ
If you want to try out the code there are a few things to watch out for.
+
You will need some internal Microsoft Pivot references and usings too. Depending upon the extent of your other customizations you will need these:
+
using System.Windows.Pivot;
using Microsoft.Pivot.Internal.Controls;
using Microsoft.Pivot.Internal.Model;
using Microsoft.Pivot.Internal.ViewModels;
using Microsoft.Pivot.Internal.Views;
+
Further things to do
Conclusion
This article is a brief guide to locating some visual elements of the Silverlight PivotViewer control in order to customize the styling of the ZoomSlider control. It targets the developer who has already started customizing the Silverlight PivotViewer control beyond the public API.
 
Any comments or request for future topics are welcome.
 

Debugging Data Bindings in XAML with Silverlight 4

[Last updated: 2011-05-24]
Introduction
Yes, you read it correctly, Silverlight 4.
 
How can I do that?

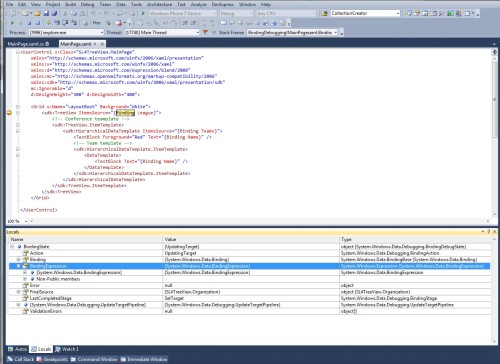
Simply install the VS2010 SP1 and Silverlight 5 Beta and you get the unexpected bonus of the XAML Parser supporting debugging your data bindings for your Silverlight 4 projects. As SL5 sits nicely in VS2010 SP1 with SL4 it is worth installing the beta just for this feature.

Debugging XAML Binding in Silverlight 4

Debugging XAML Binding in Silverlight 4 - bonus!

I was at the @SLUGUK meeting 18th May 2011, and as Mike Taulty pointed out for other ‘features’, it is difficult to know whether such things as this were introduced by the service pack or the beta as nobody seems to have stopped to check in the rush to get the SL5 beta working 🙂

Checked against the NoDo Windows Phone 7 projects and it does not work, you can set a breakpoint but it cannot resolve the symbols. The new feature automatically creates the symbol names for you. I am optimistic that this feature will work with the Mango tooling to be released by end of May 2011 (that’s next week) [UPDATE: Mango beta no Xaml debugging for now].

No point in re-documenting the feature so:

Mike Taulty’s Blog: Silverlight 5 Beta Rough Notes – Debugging Data-Binding

Code Project: Debugging Data Bindings in XAML with SIlverlight 5 Beta

Further things to do and resources 
Conclusion
This article shows a nice side-effect encountered for Silverlight 5 projects after installing the Silverlight 5 Beta. Whether it is intended or here to stay we will have to wait and see but it has already proved to be a fantastic ROI.
 
Any comments or request for future topics are welcome.

Xpert360 PivotViewer Blog Article Index

[Last updated: 2011-06-22]
Introduction
This post is intended to be a landing place to bring together links to our growing collection of PivotViewer articles in one place. We will update this article to reflect new blog posts and other useful links.
If you are not familiar with overriding the Silverlight PivotViewer control’s OnApplyTemplate() method then I recommend taking the time to work through the posts in the ‘Adventures with PivotViewer’ series and build up your portfolio of customization skills.
These articles are based on the version of the control shipped separately from the Silverlight 4 SDK. We will update and extend articles with information relevant to Silverlight 5 SDK as they become available. If you are already customizing your PivotViewer experience then dive right in:
Adventures with PivotViewer
PivotViewer Shorts
PivotViewer Miscellaneous
Examples on the Internet
Further things to do and resources
Conclusion
This article is an anchor page to our blog articles concerning the Silverlight PivotViewer control. There are a range of articles topics and technical levels. Some target the developer who is ready to start customizing the Silverlight PivotViewer control beyond the documented public API, whilst others show examples of what can be achieved.
Any comments or request for future topics are welcome.

Adventures with PivotViewer Part 9: Multi-Layered Trading Cards

Silverlight PivotViewer Layered Trading Cards

Silverlight PivotViewer Layered Trading Cards - click to view video

Introduction
Adding multi-layered trading cards is a feature enabled by the XAML data template trading card support for the version of the Silverlight PivotViewer control that will be distributed in the Silverlight 5 SDK. This article shows you how to implement a similar effect in the previous version of the control.

If you are new to our blog then you may care to take the time to work through the other posts in this series and build up you portfolio of PivotViewer customization skills.

Deep Zoom Collections and Images

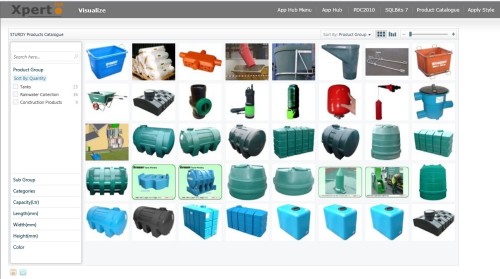
Silverlight PivotViewer Product Catalogue collection

Silverlight PivotViewer Product Catalogue basic collection images

The easiest way to achieve this effect is to generate a full set of deep zoom collection imagery for each desired layer. Also generate full sets of deep zoom images for the desired layers of the trading cards.
 
Simply merge together the folders of the image layers according to your trading cards layer designs. By default the layers 0 to 7, equating to deep zoom folders 0 to 7, are used for the deep zoom collection imagery for the lower resolutions. Only the layers 8 and above are used at runtime by PivotViewer for the individual deep zoom images: folders 7 and below can be deleted and do not need deploying.
 
PivotViewer Low-Res Trading Card Images

PivotViewer Low-Res Trading Card Image transition

 
It is important that all source images for a trading card are the same height and width. The PivotViewer Excel tool is useful for trying this as you can simply copy the Excel spreadsheet and replace the trading card images.
 
I would suggest that you use common low resolution images for the zoomed out top layers of the deep zoom pyramid. For the primary theme choose a facet category with fewest values that can be represented by color. Choose images that represent a secondary attribute such as a category-type facet. By following this approach the users can quickly and easily work with the collection trading cards at low resolutions by visual association of color and category icon.
 

PivotViewer Hi-Res Trading Card Images

PivotViewer Hi-Res Trading Card Image Transitions

 
At the other end of the scale with the highest resolution images you probably will want more information, mini-graphs, etc. These images can be captured from a simple custom tool that uses a XAML data template bound to the collection data. If you do this you ought to be able to reuse your code with the vNext version of PivotViewer.
 
PivotViewer Trading Card

PivotViewer Trading Card Hi-Res from XAML

 
Further things to do
Conclusion
This article is just a brief run through that introduces multi-layered visualization of Silverlight PivotViewer control trading cards. It targets the developer who has already started customizing the Silverlight PivotViewer control in preparation for the next version scheduled to be distributed with the Silverlight 5 SDK. Any comments or request for future topics are welcome.